Archive for category interior
Before & After Photos
Posted by Brian in bathroom, bedroom, decorating, diy, finished, floor plans, interior, kitchen, living room, photos, renovations, small spaces on May 25, 2012
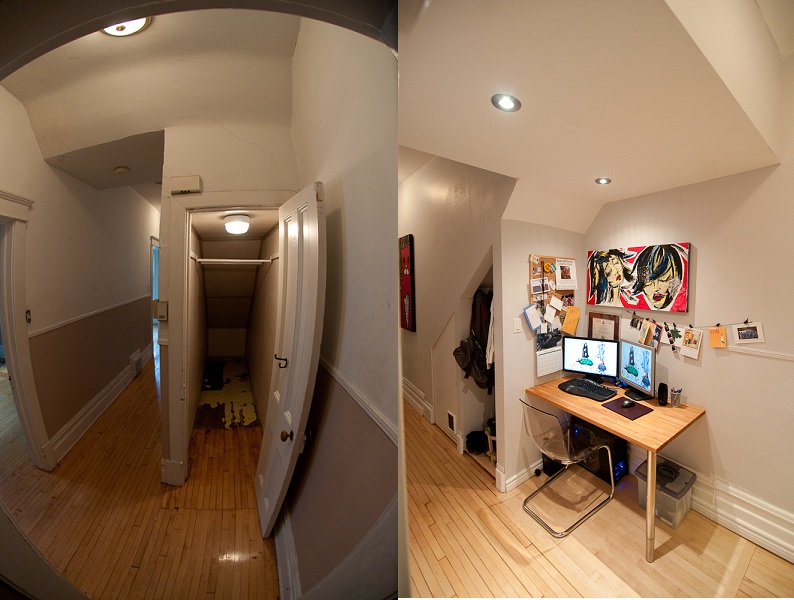
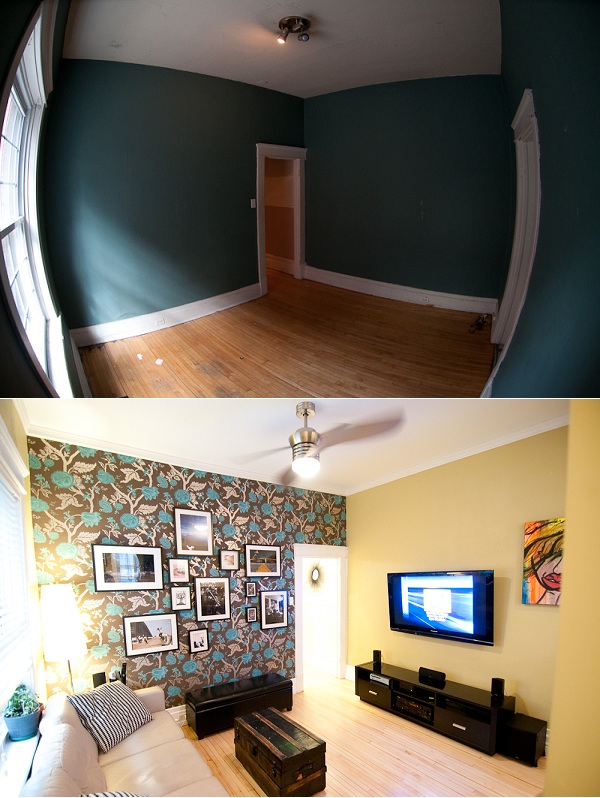
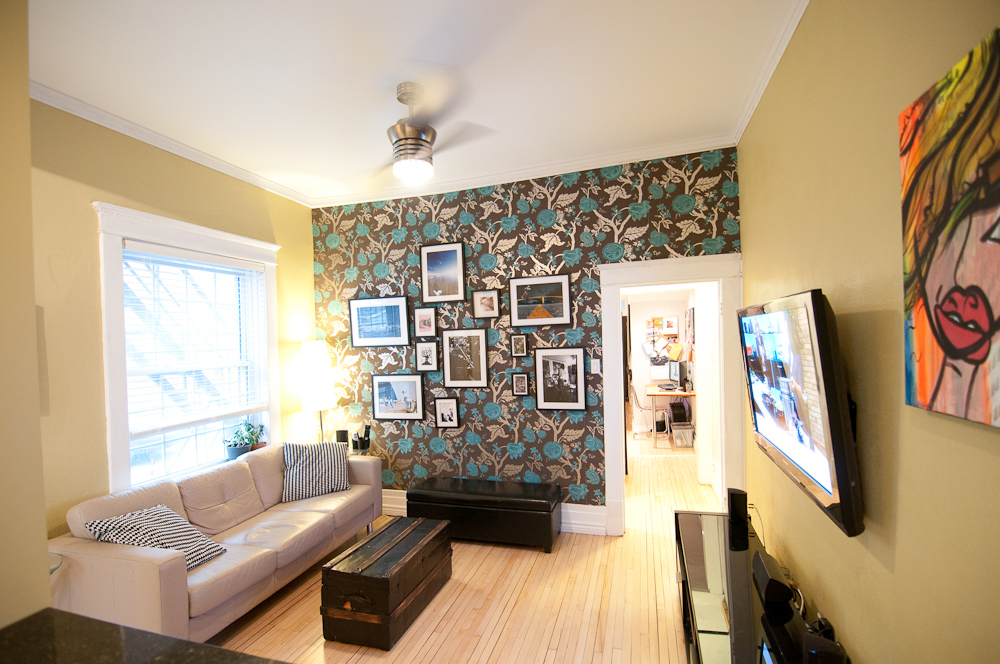
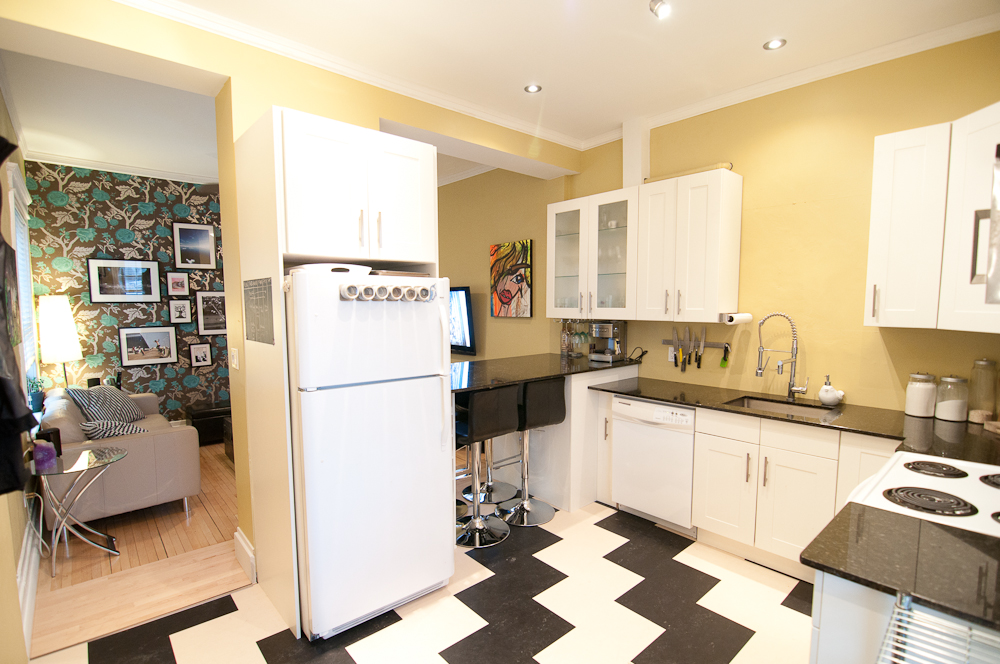
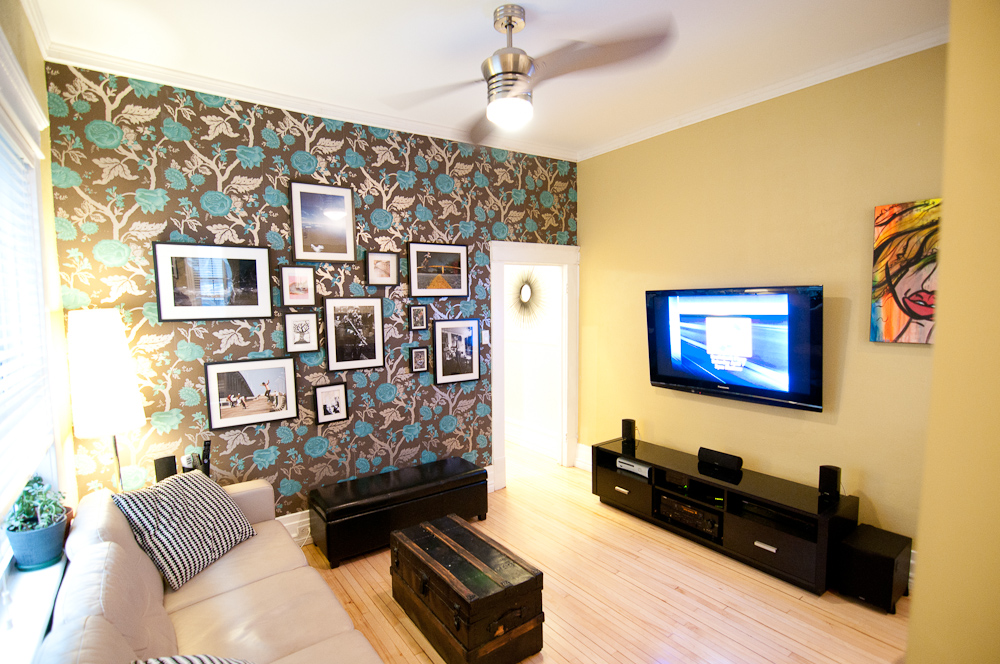
It’s been a long time since we’ve done some updates, we’ve been living comfortable for over a year now since the major renovations took place. Â In that time we’ve put the house on the market for 2 weeks showed it to 20+ potential buyers, decided not to sell, then put our apartment up for rent on Kijiji, showed it to several potential tenants then decided not to move, and finally decided to do some more renovations. Â We’re sticking it out a while longer and have some smaller renovations to do this coming summer. Â The next couple of weeks will involve building a small backyard, and new deck with roof for the back entrance (our main entrance), this will provide us a bit of outdoor space to relax in the summer. Â Following those renovations we’re planning to finish up the kitchen (backsplash and pot rack). Â Here are some before & after photos of our apartment, not everything is finished, but pretty close. Â Thanks to everyone that helped us get to this!


Bedroom almost finished.. moving in tomorrow
Posted by Brian in bedroom, decorating, diy, interior, photos, small spaces on January 22, 2011
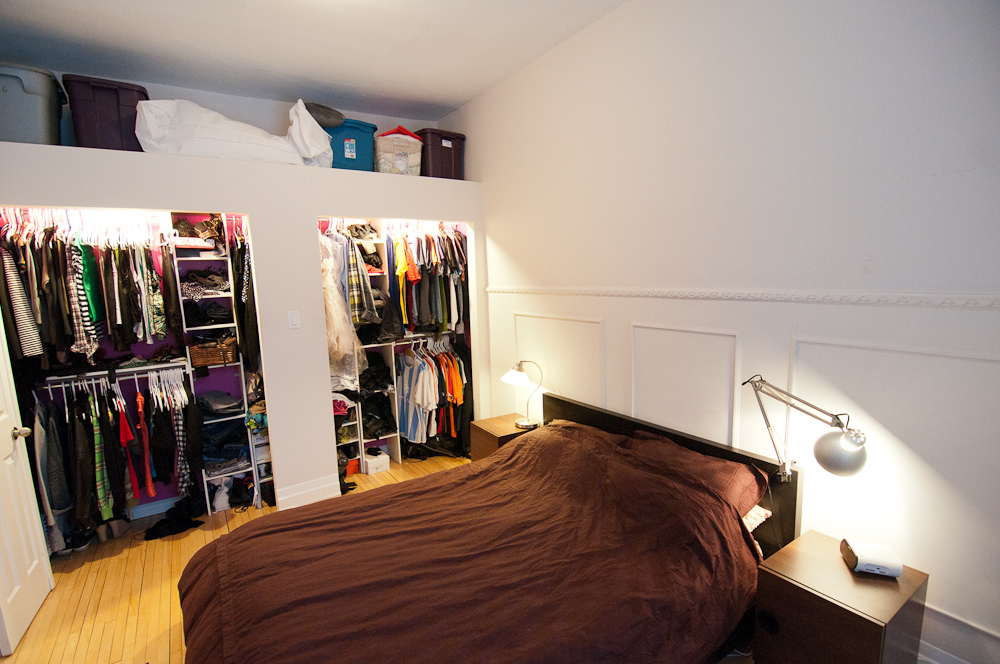
I spent the day building a closet organizer today, putting in some baseboards, and installing one of the set of  blinds we purchased on Thursday from blinds to go.  Just have to put some closet doors on, and a finishing baseboard around the room and the bedroom should be finished.  We had the floors finished 2 weeks ago through out and they look fantastic.. the patches of new flooring don’t exactly blend in, but hopefully over time they start to mesh with the old.  The bathroom is also almost done, we just have to mount the shower and install 2 pot lights.  Our art studio/2nd bedroom is also finished (minus the baseboards), the living room still needs to be wallpapered and baseboarded, then there’s the kitchen.. not quite there yet.  We probably have 2 more weeks and 2 weekends of work to go on the kitchen before we’re ready to get the granite guys in.. now that I’ve put a timeline on it, it will probably be 4 weeks.  Either way we’re partly moving in tomorrow (bed, clothes, food, kitties, xbox) and commencing life in the new house..  Photos of the bedroom almost there but still empty:


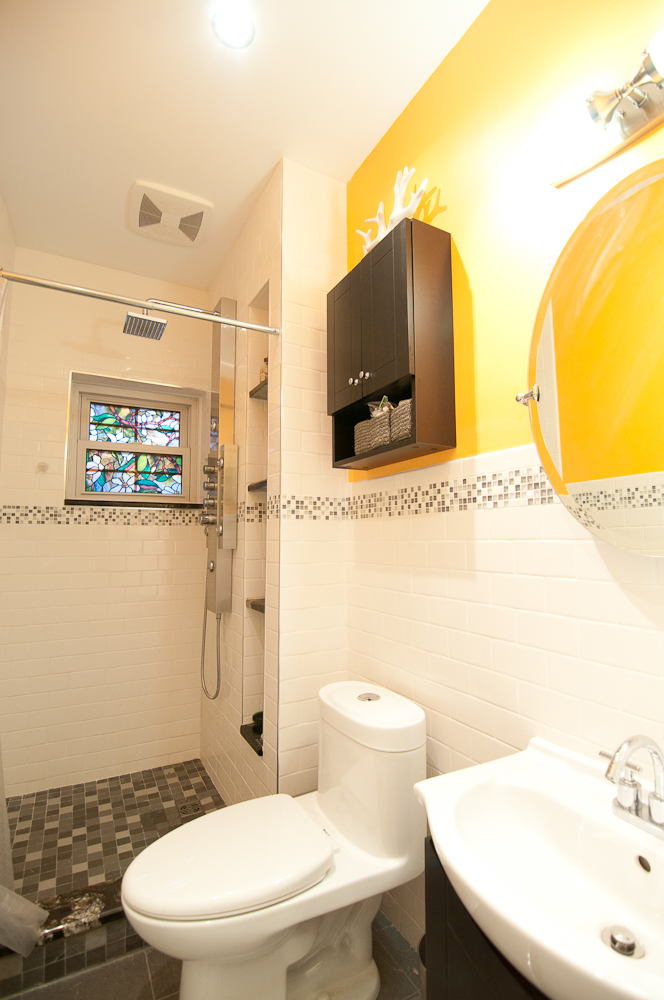
Bathroom tiling complete and the toilet is back
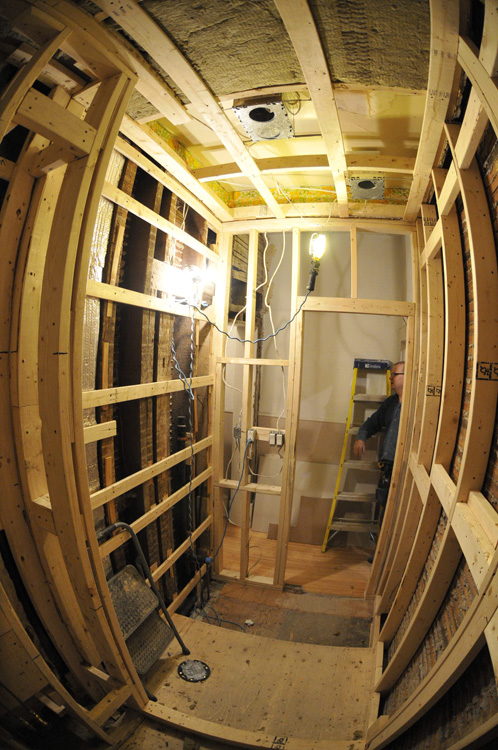
Finally, after almost 2 months of visiting McNabb to use the bathrooms, we have our toilet back. Â It’s been a super big push for the past week and a half, by my parents, uncle, Ilona and I. Â We have to especially thank my uncle Roger and my mom who spent hours at the house putting in all the tiles, it looks fantastic. Â We still have some grouting to do, the plumbing for the sink to attach, and finally get some glass fitted for the door, but at least we have a toilet! Â My dad spent the week prepping the floors for the hardwood repairs that start tomorrow. Â We also finished painting the bedroom, the studio room and the hallway. Â Can’t wait to see how the floors look on Friday, and it will be really nice to not have to go to the house everyday after work this week. Â Here are some photos of the almost done bathroom:


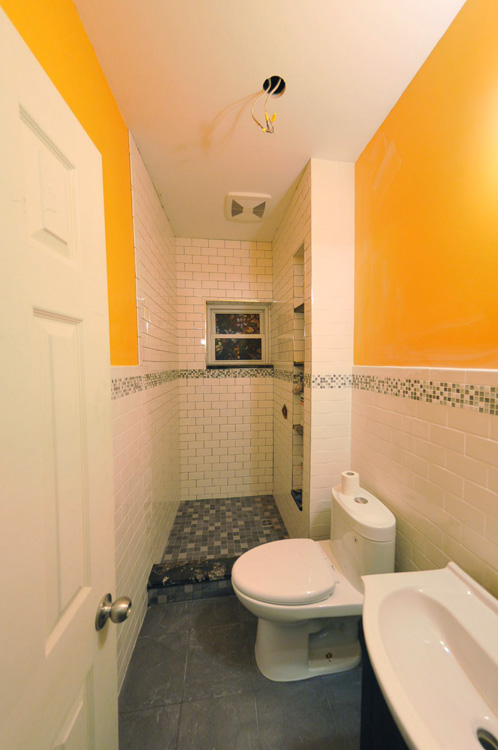
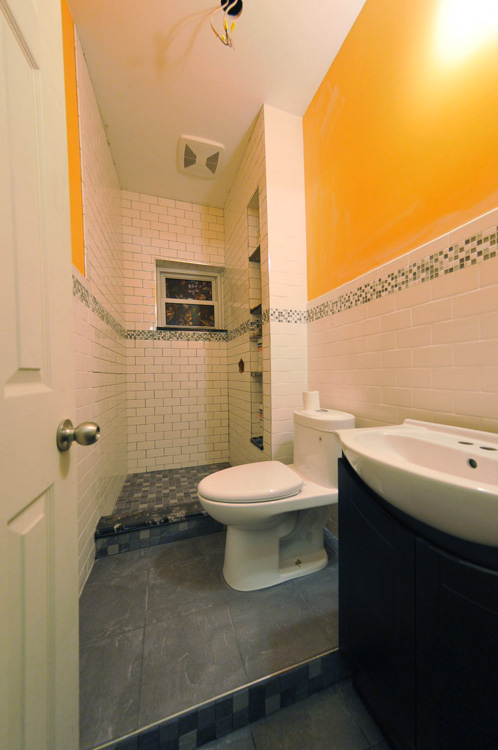


finished bathroom.
Bathroom Update
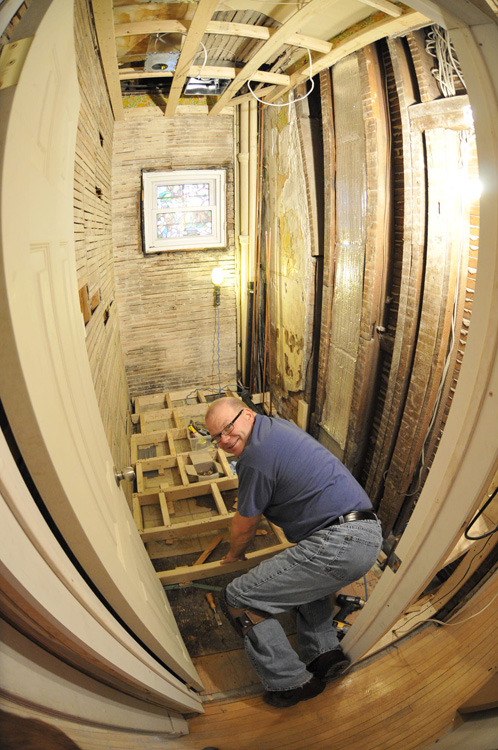
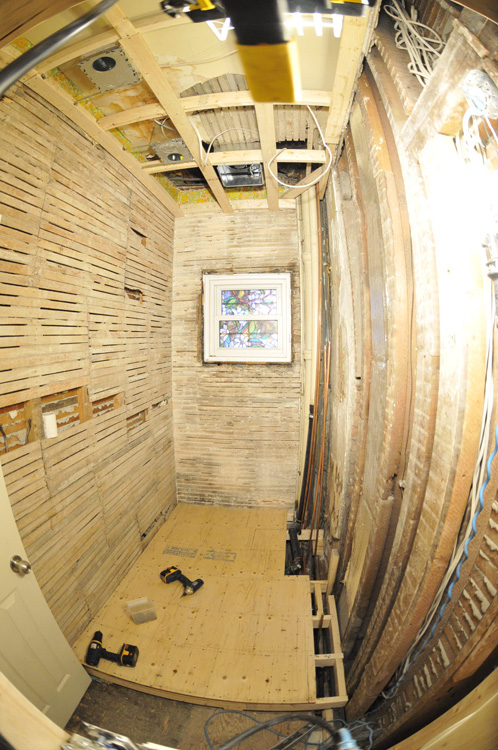
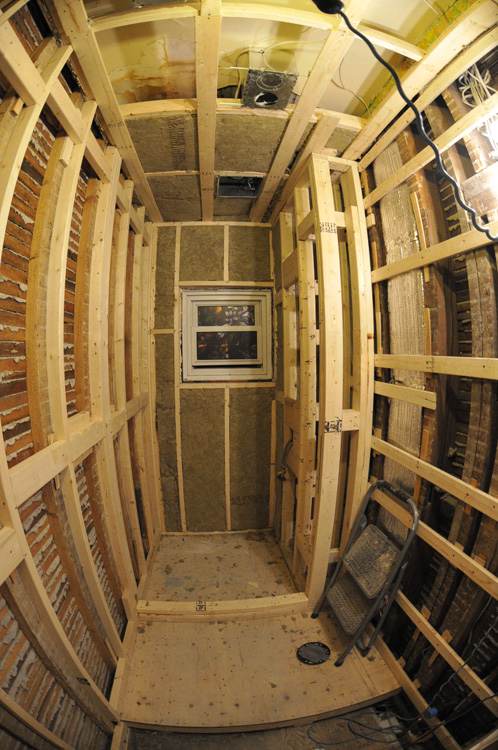
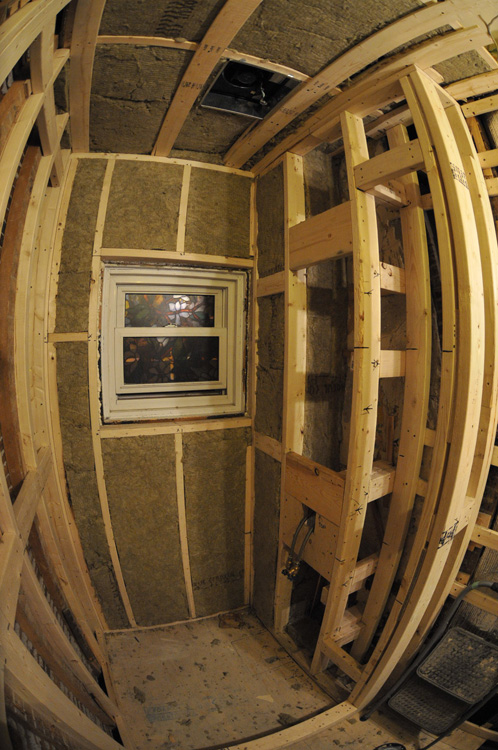
We’ve had a lot of work done on the bathroom over the past couple of weeks, mostly by my uncle Roger. Â Roger started out building up a new raised floor for the shower and toilet area, we had to do this to avoid cutting in to the original cast iron stack. Â Since the stack was being used for all 3 apartments and could potentially be brittle, it was too much risk at this point to risk cutting it. Â So we reused the pipes were the toilet already was, to get the right slope we had to elevate it a bit to place it where we wanted.
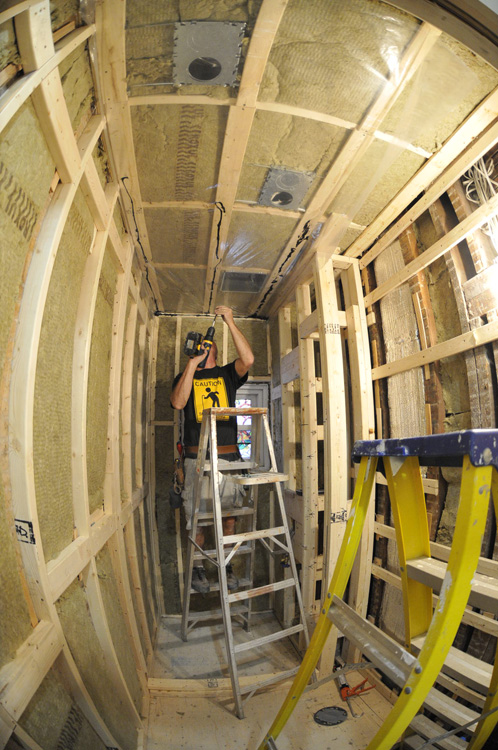
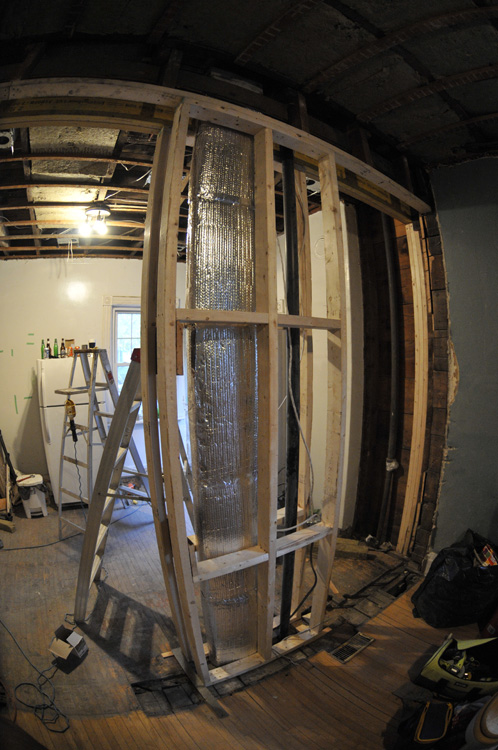
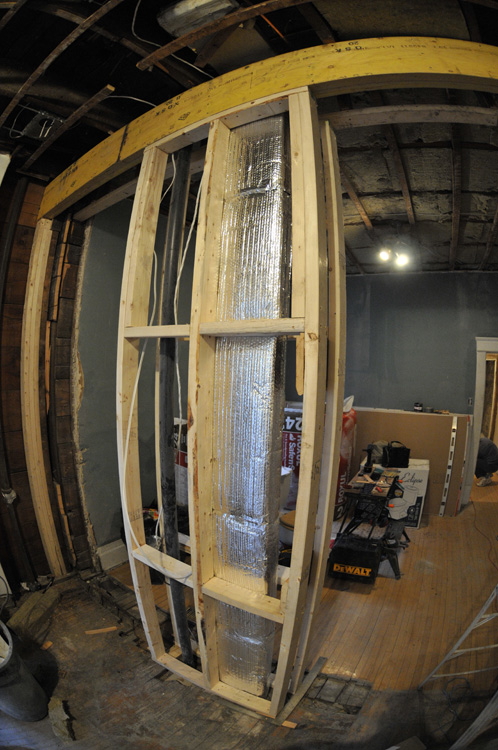
After the floors, we ended up framing over all the walls, framing in the shower and making sure everything was very solid. Â If we had tiled over what was there, the swaying walls and squishy floor would have resulted in broken tiles within the first couple of weeks. Â This past weekend my dad and I insulated the washroom, and started installing the cement board and ceiling.
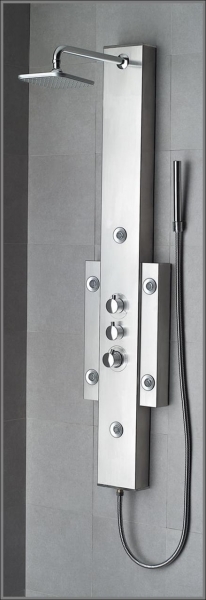
Also we’ve picked out our shower unit, this crazy robot looking thing that steams, and rains and all sorts of fun. Â It’s pretty crazy that the bathroom is around 30 square feet.. tiny! Â Hopefully the next update we have some tiling to show.


Kitchen & living room updates
Things are/were moving along pretty good at the house, the kitchen has been at a bit of a stand still, we’re waiting for the marmoleum floors to come in and then we’ll start leveling out and attaching the lower cabinets to the walls. Â We had the good fortune of having Matt over again (this time with Meghan) to build our Ikea cabinets for us, I tell you, Ikea is even easier when someone else assembles everything for you! Â The corner cabinet has double lazy susans which are pretty awesome.
In the living room we’ve got the walls painted, and decided to paint the window frame as well (not shown below) we’ve also got all the trim up, with the exception of one piece on the wallpaper wall. Â We had one attempt at papering it, but it didn’t turn out as planned, so we’ll be trying it again.
I should have more updates this weekend, the bathroom is coming along thanks to my uncle Roger, who has built up a new floor, added some extra framing for support, and built out the shower. Â It’s really nice to have a plumber and general contractor in the family! Â Those photos to come in the next post!


Building our own crown molding
Posted by Brian in diy, interior, photos, renovations on November 25, 2010
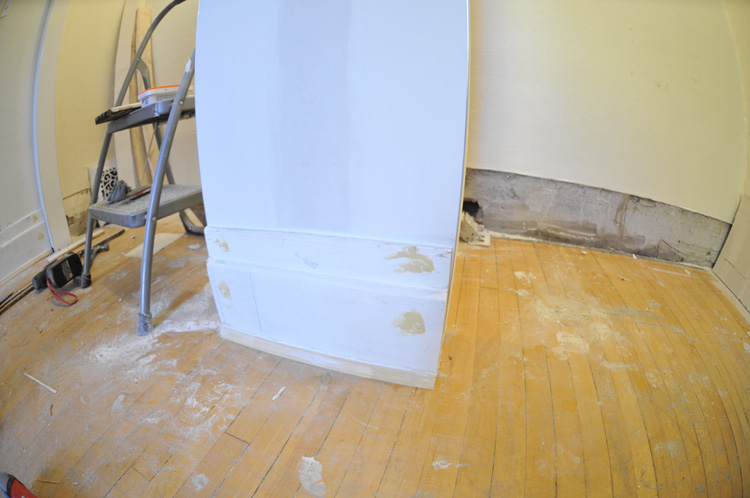
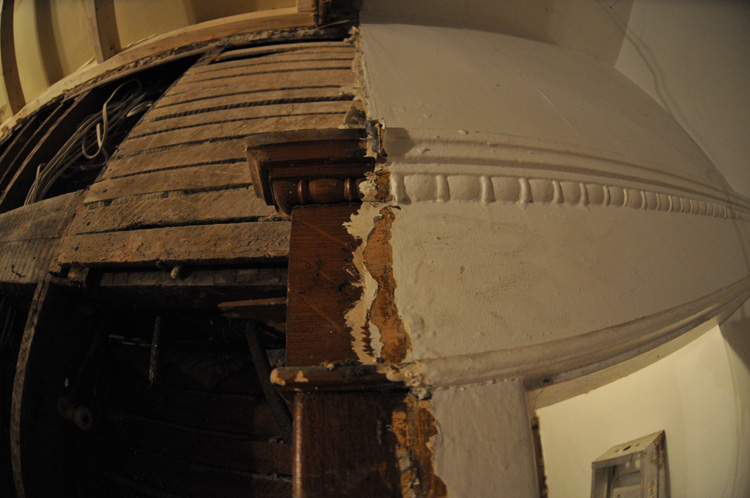
In old houses that have plaster walls and ceilings, the options are limited when it comes to finishing the corners/joints between the wall and ceiling.  We tore down the ceilings so that we could add sound and fire insulation, but left the original plaster walls in tact.  After doing some reading we realized there was no easy way to have a neat finished dry wall joint between the two.  Crown molding was the favored option from the get go, however the combination of it’s stiffness, and the crookedness of our walls/ceilings didn’t favor to well.  That’s when we came up with the idea to build our own molding out of window trim, a 1×3 mdm board and a cove (see reverse of 1/4 round).
The process was actually pretty simple, it looks great and was easy to install.  Basically we had 3 pieces that we layered on top of each other, for all the joints, we cut them at 45 degrees to force the matching up better, and used a nail gun to tack it into the wall.  Using the 3 separate flimsy pieces allowed us the luxury of bending them slightly to follow the crooked lines created by the ceiling.  Below are some photos showing the separate pieces and the partially finished product.  More photos to come when we finish up the kitchen and living room 🙂


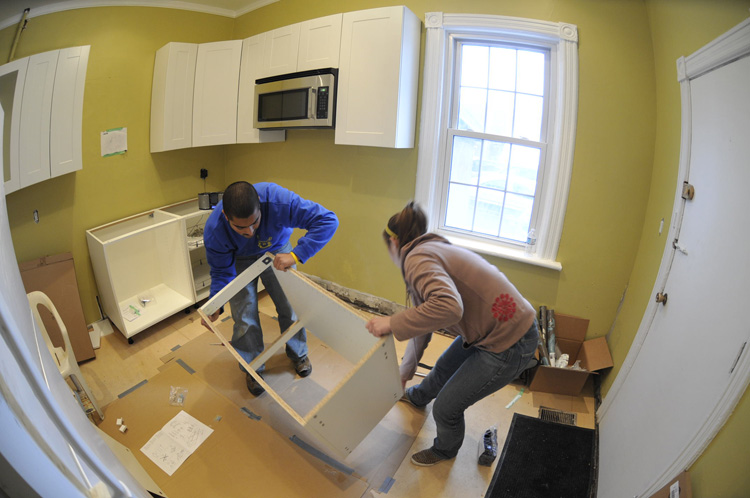
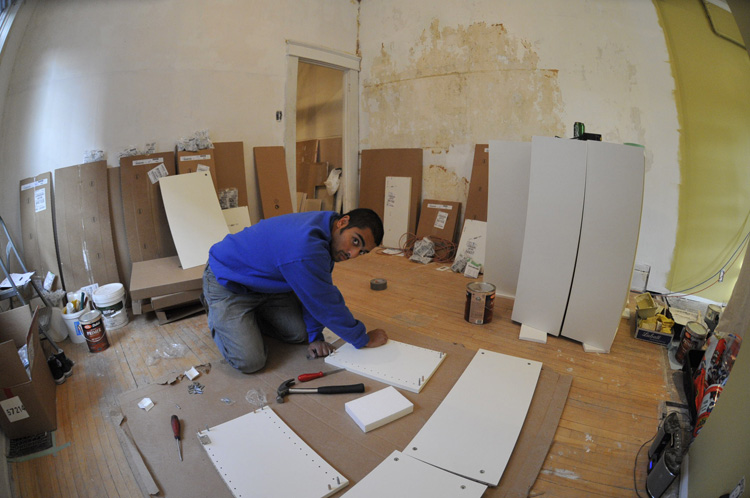
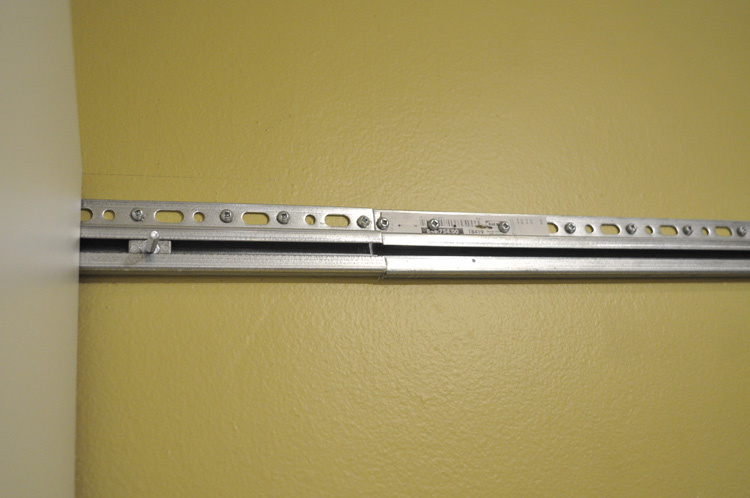
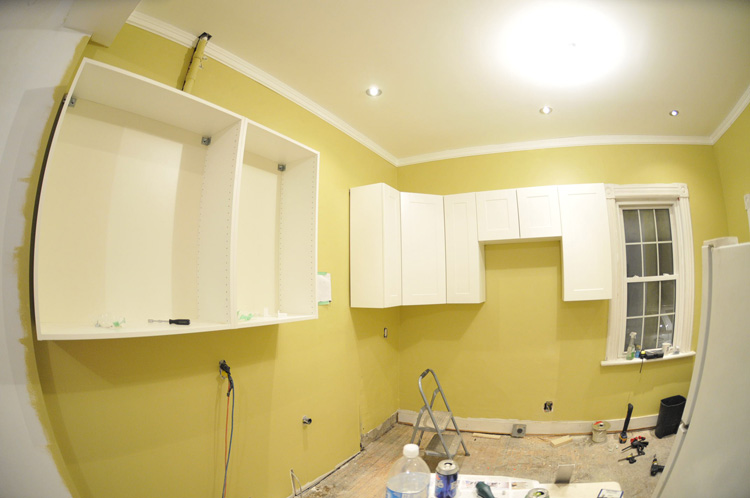
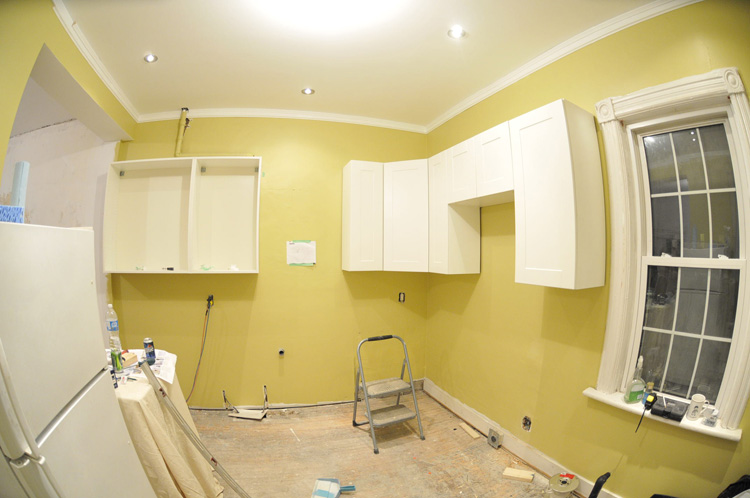
Upper Kitchen Cabinets installed!
Saturday morning our friend Matt (cousin) came over and helped out with the Kitchen cabinets, when Rob told us that installing an Ikea kitchen was easy, I had no idea that it would be this easy. Â If you can build an Ikea coffee table, you can pretty much build an Ikea kitchen. Â Essentially you build all the cabinets, draw a level line on the wall at a certain height, install a horizontal metal bar/rack on that line, then hang the cabinets one at a time. Â The door hardware just snaps into the doors, and attaches right to the cabinets, fully adjustable and they all come with the anti-slam hardware. Â With 2 people it would easily be feasible in a weekend, unfortunately I had to work Sunday morning for a deploy, so I only got a few hours in, but we’ve got all the upper cabinets installed and level.
The largest upper cabinet on the left closest to the living room has glass doors that we probably won’t install until we move in, we also still have to pick out some handles for the doors, we’ll probably pick these up from Lee Valley Tools, they have the biggest (and cheapest) selection we’ve been able to find.


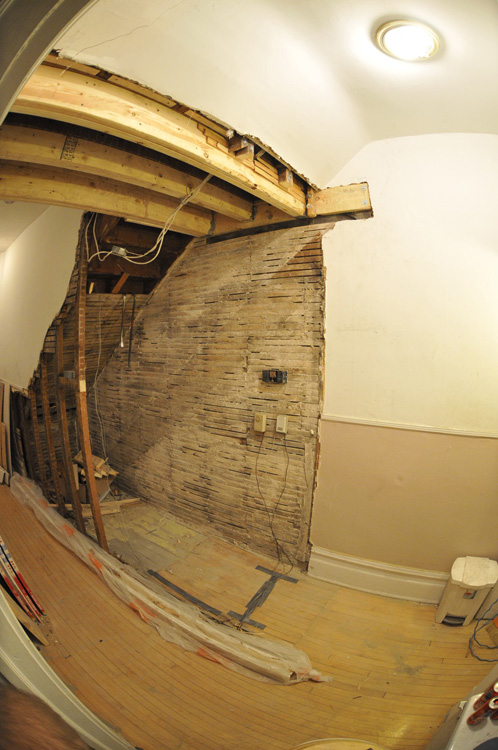
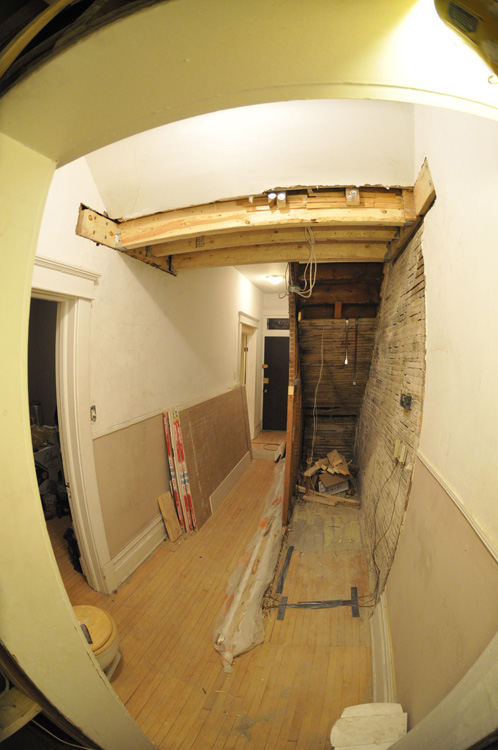
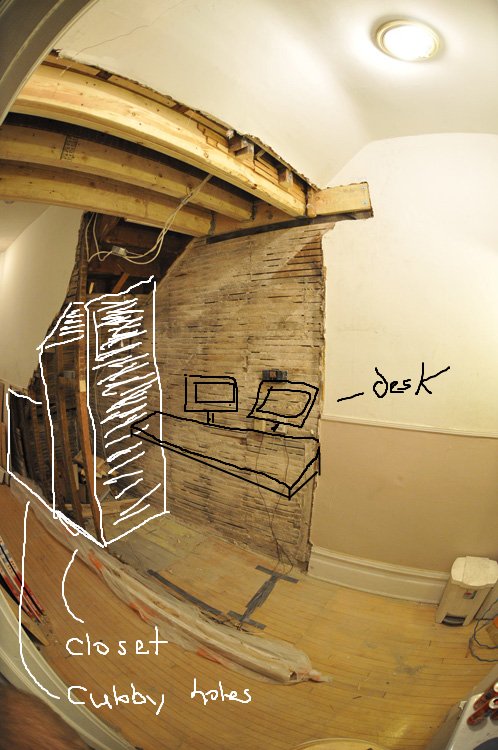
Closet under the stairs removed!
Posted by Brian in floor plans, interior, photos, renovations, small spaces on November 14, 2010
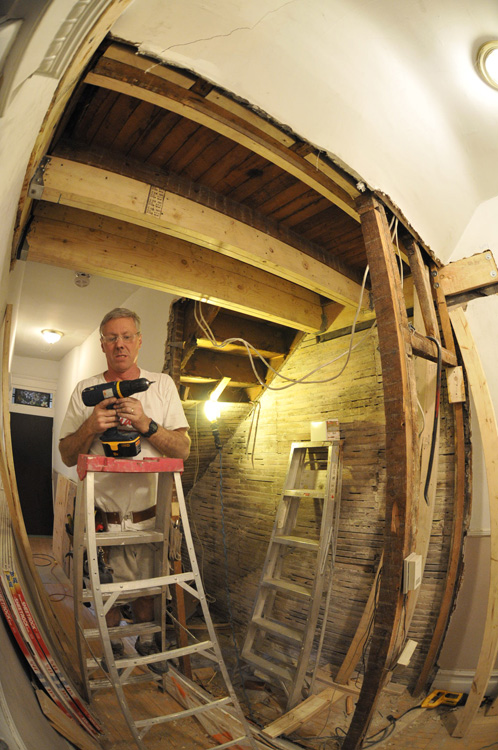
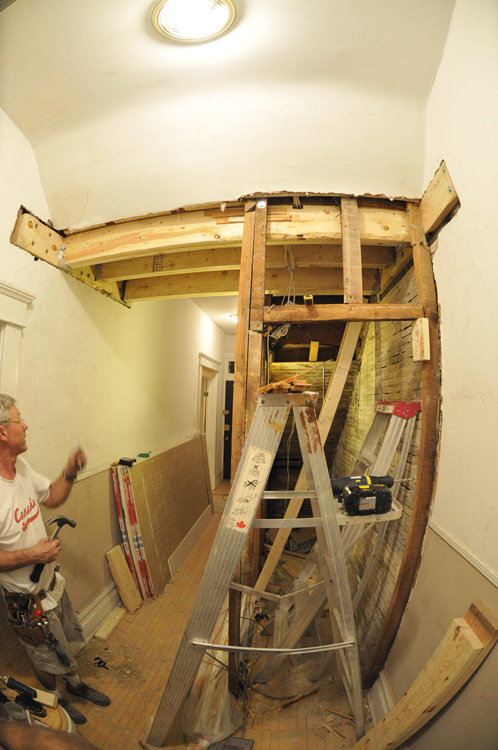
The section under the stairs has finally been taken care of, what was previously there was pretty much the most unsafe thing we’ve found in our house (so far). Â The wall that formed the closet space under the stairs was built from about 6 2×4’s with minimal bracing, what we didn’t know until we investigated further is that this wall supported the entire set of stairs, plus the landings for the 2nd and 3rd apartments!! Â We couldn’t believe it, essentially the upstairs platform was precariously balanced on the wall, and tacked into the inside hallway wall, and exterior wall.
To beef it up, we put in some new stringers in both walls, attached with about 10-12 5″ long 1/4″ thick lag screws, we then used 2 double 2×8 beams and a double 2×6 beam as the new floor joists for the landing up top, and hung those from joint hangers on the stringers. Â The result is way more space below for my computer area, and a more open hallway.
Below are some before photos, during photos, after photos, and a little sketch on one of the photos showing our plans for the space in here. Â We’re planning to build a small computer nook for myself, a closet space (without a door), some shelves, and a little cubby with a trap door/cat door to put the smelly litter boxes in. Â I’m still contemplating whether I should eventually attempt to build a small motion sensor activated fan and exhaust from that little cubby to the outside of the house.. maybe next year if we’re looking for something to work on!


Kitchen colours, custom molding and pot lights!
Posted by Brian in decorating, interior, kitchen, photos on November 7, 2010
It’s been a busy week since the last post, we’ve had lots of help from friends and family, and are finally starting to do some finishing touches. Â Last blog post we had just had the drywallers in, or coming in, to tape, mud and sand the drywall we had put up. Â Since then, last week (for back to back nights) Alex and Danny came and helped us paint, as well as Rob who helped us with painting and installing our own molding along the ceiling.
Since our ceilings and walls are so crooked and the plaster is so old, we’re unable to finish the corners where the walls meet the ceiling. Â Crown molding apparently requires relatively straight ceilings, so we decided to create our own “crown molding” out of 3 different pieces of wood/molding tacked together which allowed us to use slightly more flexible wood, and save some money at the same time.
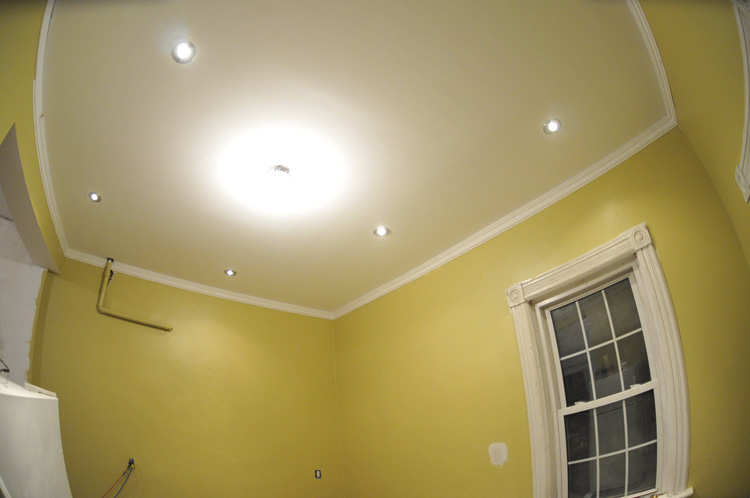
Sunday afternoon we continued putting up some of the molding, and also installed the potlights in the kitchen, Ilona was definitely much quicker at installing the lights than I was, and it was really nice to finally see some finishing touches being added. Â We still have a long ways to go, but the next update might also be just as colourful.


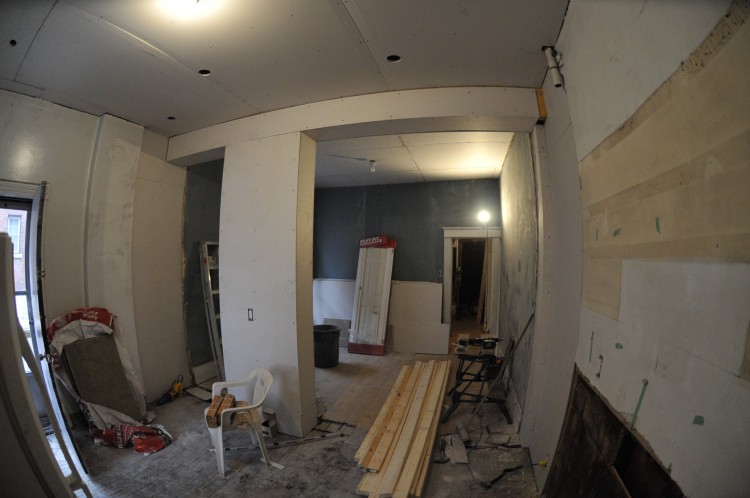
Kitchen & Living room drywalled!
Posted by Brian in interior, kitchen, photos, renovations on November 1, 2010
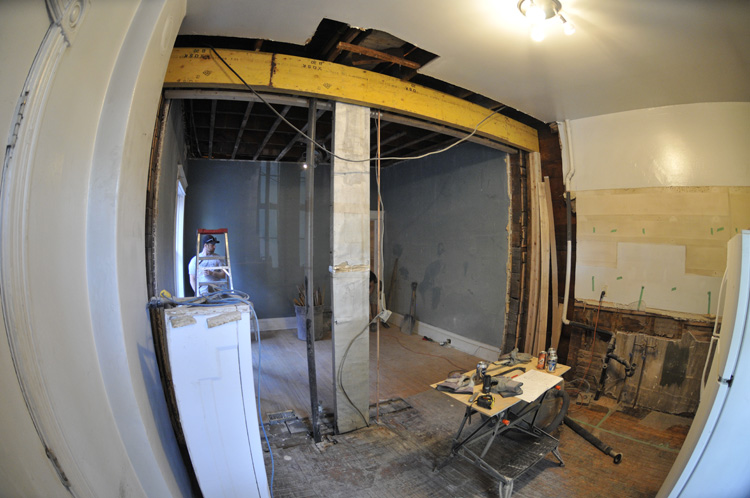
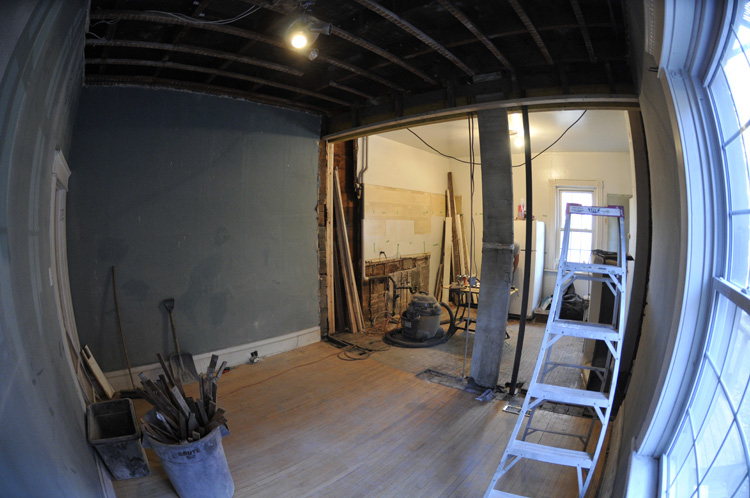
It’s been a while since an update, we’ve moved out of our condo off Walkley, into a temporary luxury suite at the Garsons residence, and have been busy working away on the new place.  Last Thursday my dad and Jean rented a drywall jack, and did the ceilings in the kitchen and living room, the following day Ilona and I successfully finished the beam and column between the kitchen and living room.  Saturday Tyler came over and we framed the 2 support columns for the beam and drywalled them as well.  Today we got the good news that our drywall finisher Derek will be done by Thursday and we should be able to paint the kitchen and living room, and start installing the cabinets!
Ilona also picked out a checkered black and white marmoleum click-tile for the kitchen floors that we might be installing soon, after some research we decided to go with marmoleum because of it’s durability and eco-friendliness, she found it at Dynasty Flooring in Ottawa. Â Here are some photos from the living room and kitchen with finished walls and ceilings:


Wallpapers
Posted by Ilona in decorating, interior on October 25, 2010
So Brian and I want to do something cool with the worst wall in the house.. its cracked and wavy with bubbles and lumps.. we thought some interesting wallpaper would take away from the major flaws, and add some dimension and style to the room. After some research i found these beauties on 2 websites, flavorleague.com and wallpaperstore.com. Its gonna be tough to decide which one will grace our living room wall!!


Faucet ordered & Bathroom tiles & vanity purchased
Ilona and I decided to find our kitchen faucet online, since we didn’t like anything under $700 at the local stores. Â It’s pretty incredible that you can purchase a faucet for over $1,000, actually it’s more ridiculous than incredible. Â We went on EBay and found this gem for $160 shipping included.
On Saturday Ilona also headed to Rona with my mom to pick out some tiles for the bathroom and a small vanity (to save space). Â Ilona ended up picking out some white subway tiles for the bathroom and shower walls, a large dark grey square tile for the floors, and small square grey tiles for the bottom of the shower. Â She also purchased these really small cool glass tiles to use as borders.
Since our bathroom is so small, Ilona found this vanity which is less deep than your average one, which should allow us to have a normal sized door on the washroom, and have a bit more wiggle room. Â It will be another couple of weeks to see photos of the ceramics tho, so check back.


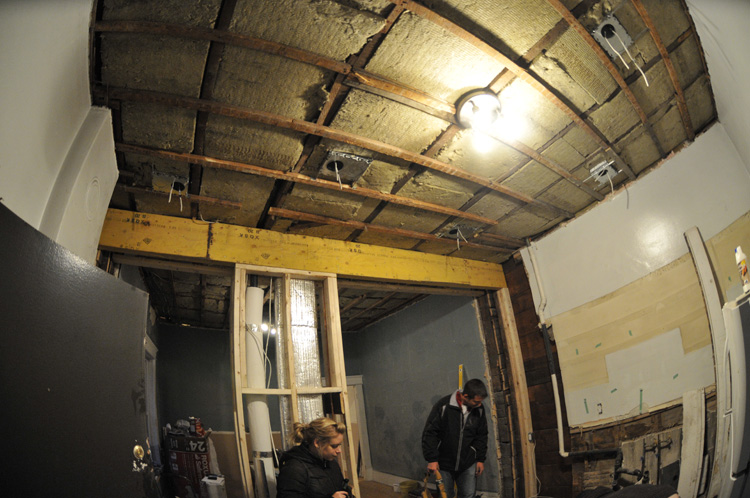
End of weekend update
Posted by Brian in bathroom, interior, photos, renovations on October 24, 2010
Well there’s not a lot to show this week, but there has definitely been a lot of work accomplished this past week.  On Wednesday Danny came over and we got all of the pot light boxes installed in the kitchen.  On Saturday my uncle roger came over and we got started on the bathroom, and continued to work Sunday on it.  Tyler also came over on Saturday and we built some shelving units in the basement as well as the column that will separate the living room and kitchen. Our plumbing is now set up, and going to work for moving the bathroom around as planned, Ilona picked out our selection of tiles for the ceramic shower, floors and walls in the bathroom, the colours are great.  Our friends Bob and Michelle came over as well as Rob today and we managed to get the kitchen wired properly, the ceiling insulated, more tar stripped off the wood floors,  and a lot of the paint stripped off the window in our living room.  Last weekend Rob and I also wired the living room for the home theatre, and finished insulating the ceilings for fire and sound.  Things are definitely taking a little bit longer than we expected, we have to move out of our current condo on Wednesday and will be shacking up with my parents for a couple of weeks.  It’s hard to believe we thought we’d be moving in this week a month ago.  One thing we’ve learned is everything takes twice as long as you would think it does, and every project you start in an old home inevitably starts another project that you hadn’t anticipated on doing.  We’re glad we’re doing things properly, and the extra couple weeks of waiting should pay off.


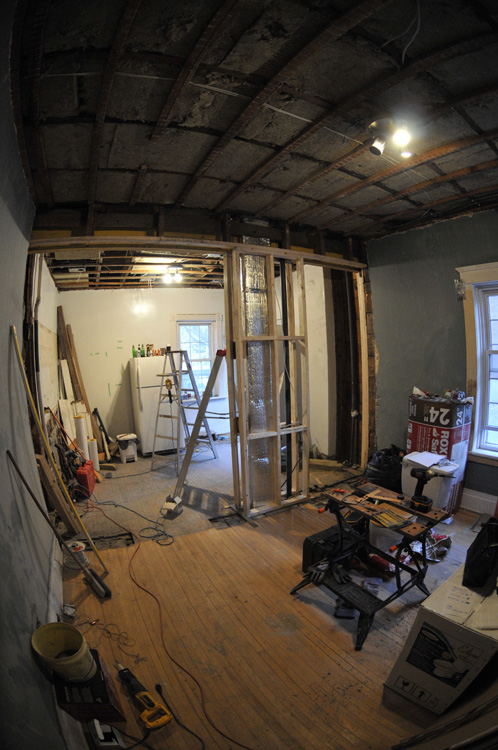


Mid weekend update
Posted by Brian in bathroom, bedroom, decorating, interior, kitchen, photos, renovations on October 16, 2010
We’re a little behind schedule, but things are still moving along. Â We had a contractor come in last week to put up a beam to support our tenants kitchen, which was above ours, and was being supported by a wall resting directly on unsupported floor joists beneath our kitchen. Â We took down that extra wall which was the plan all along and it really opened up the space. Â We spent 12 hours at the house today, finished gutting the living room, and we’re finally starting some construction in there. Â At 8pm tonight my dad and I finished putting up roxul sound/fire proof insulation in the ceiling. Â The bathroom is completely gutted and hopefully this week we’ll get to work building that out. Â Really too tired, and still feeling under the weather to have much more to say. Â One nice note is the wood trim around the doors/windows appears to have beautiful wood underneath as you can see from one of the photos in this post. Â Also we ordered our cabinets today, and tomorrow we’ll start wiring the internet/home theatre etc.


More demolitions, some renovations and some news
Posted by Brian in demolition, exterior, interior, photos, renovations on October 10, 2010
It’s been a long week, we’ve filled up the entire dumpster with plaster, drywall and wood. I can’t believe before we started I didn’t think we’d even need a dumpster, really happy we ended up with one, thanks Ken and Marianne! We picked out some granite on Wednesday from Emerald Tiles on Sheffield road, lucky for us Andy Paul who helped Rob out with his kitchen, was nice enough to give us a great deal on some granite too. Next week we have some contractors coming in to remove the wall between the kitchen and living room, my dad and I re-routed the piping in the kitchen into a column that we’ll be building, Jean is almost finished building a closet into the master bedroom, and we discovered hardwood!! under 4 layers of tiles & plywood in the kitchen. I also laid some new patio stones in the front since the walkway had completely deteriorated to dirt, and Rob and I raised the side deck about 8 inches so it’s no longer drooping. Here’s a few photos from the day:


Kitchen Floor Plans
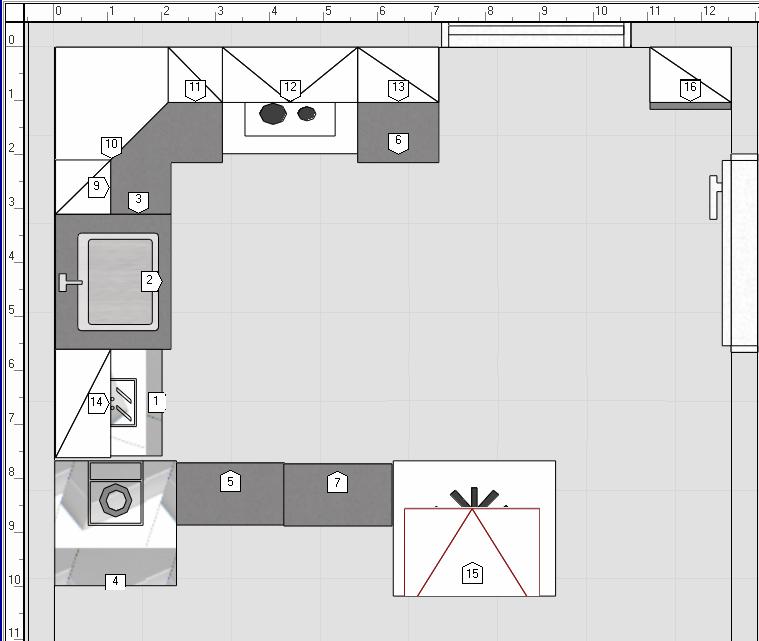
Posted by Brian in floor plans, interior, kitchen, renovations on October 4, 2010
Ilona and I came up with a design for our kitchen, and my mom eagerly put it all into the ikea kitchen planner. Â I’ve tried the software out before and just find it too buggy to use, however she managed to get it all put in (minus our column). Â There are a few slight oddities (floating upper cabinets), no counter tops.. but overall it gives you an idea of what it will look like, and the materials necessary to purchase it. Â It’s looking like we’re going to be about $3000 for cabinets, Wednesday we’ll be going to look at granite counter tops to see if the cost will be worth it.

Demolitions Day 1
Posted by Brian in demolition, interior, photos, renovations on October 3, 2010
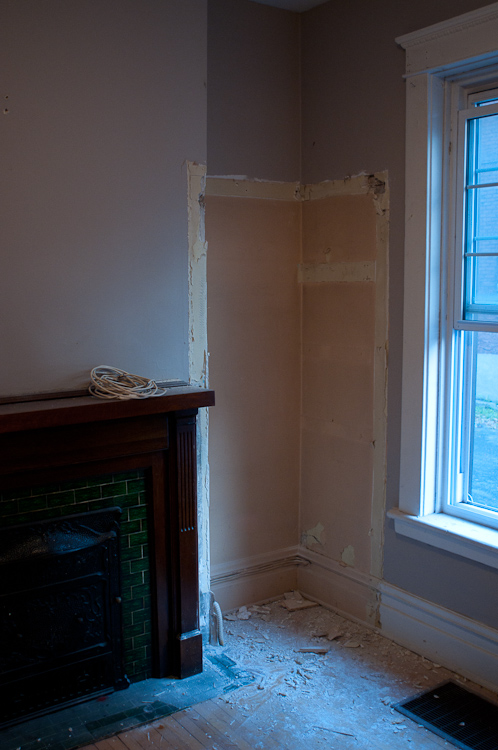
Demolitions started today, it was pretty fun, Marianne and Ken (Ilona’s parents) are sending us a bin to dump all our waste into tomorrow, which we’re really looking forward to, and very much appreciative about. Â My parents and Jean were over today helping with the floor plans some of the demolitions. Â We started out with taking apart the closet under the stairs, ripping out the cupboards in the kitchen, cutting into the wall seperating the kitchen and living room, and taking out the fireplace in the master bedroom. Â The fireplace in the master bedroom was actually a faux fire place, built entirely of real bricks, Jean took care of it nicely. Â It looks like we’re going to have a lot of work ahead of us, our plan has grown slightly in the fact that we’re going to re-do the washroom at the same time, turning it into a ceramic shower, toilet and sink/vanity. Â The tub that’s in there right now is so small it’s useless as a bathtub anyways, and with the limited space we have, we think it’s the best option. Â Here’s a few photos of the demolition from today.


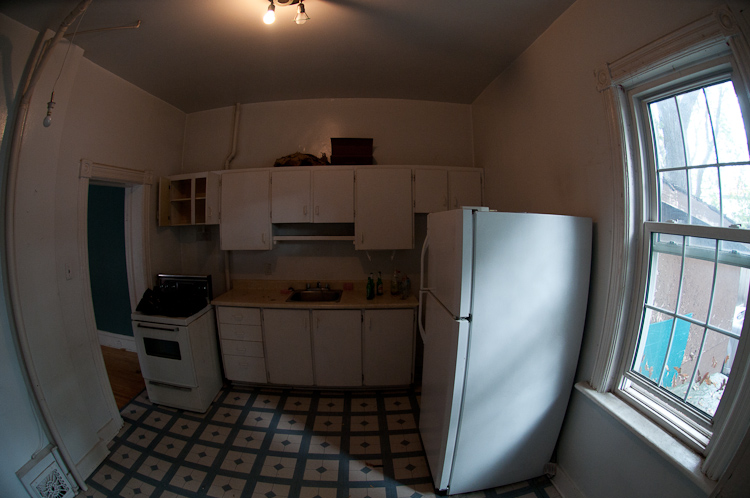
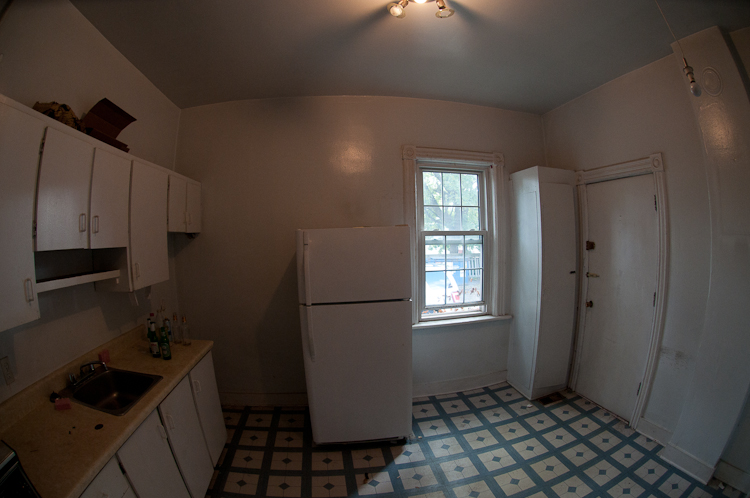
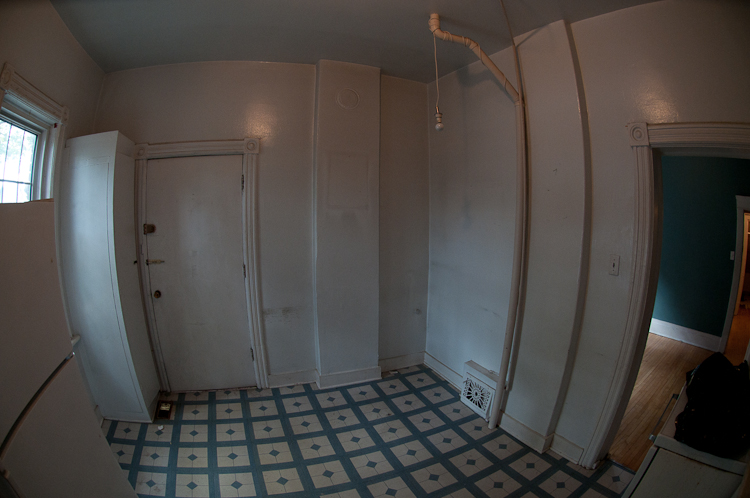
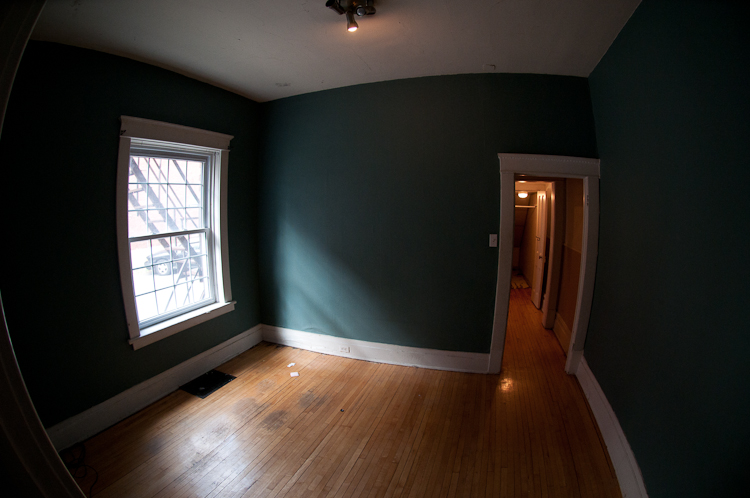
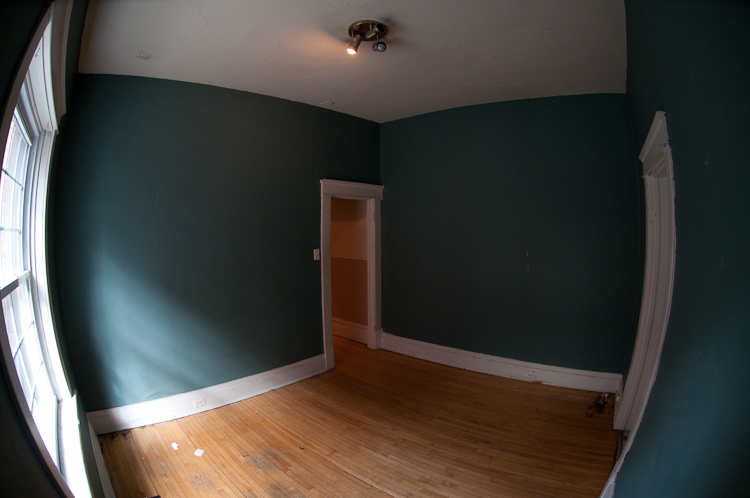
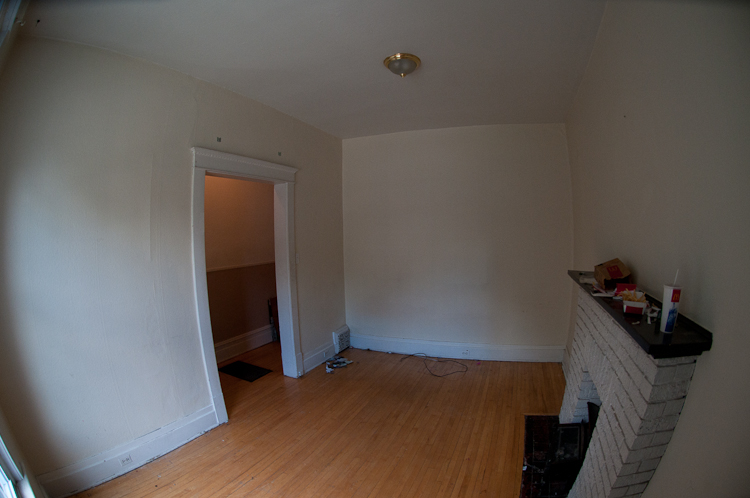
Apartment 1 – The Before Photos
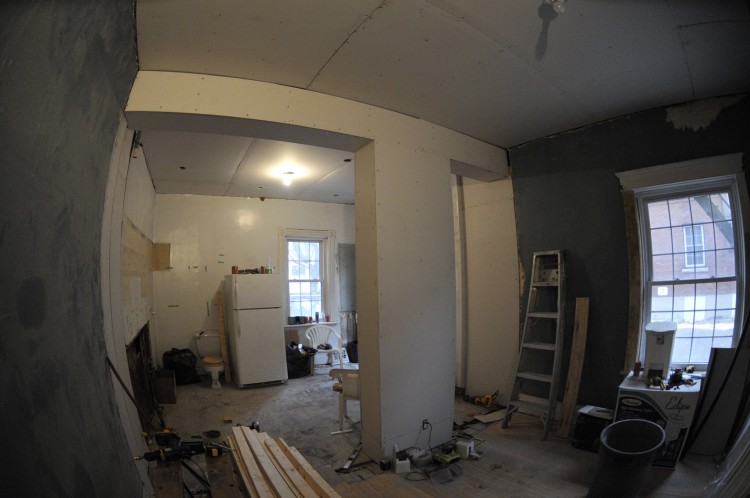
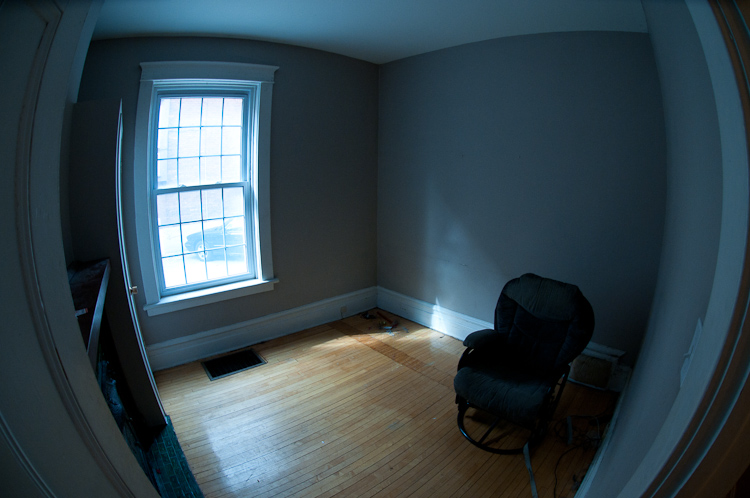
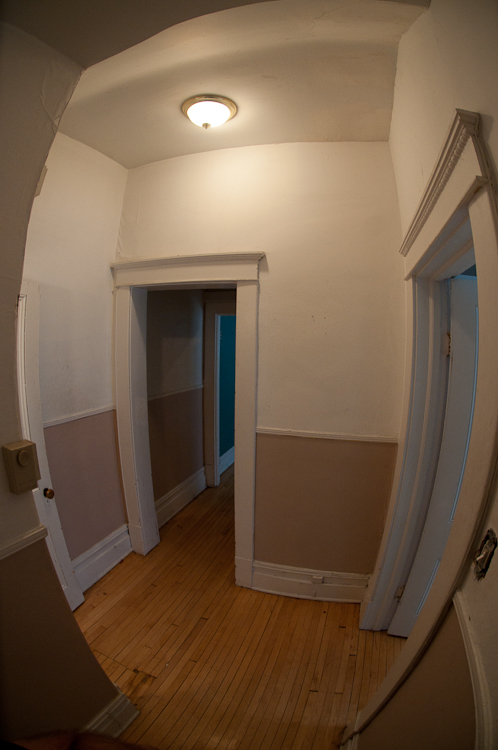
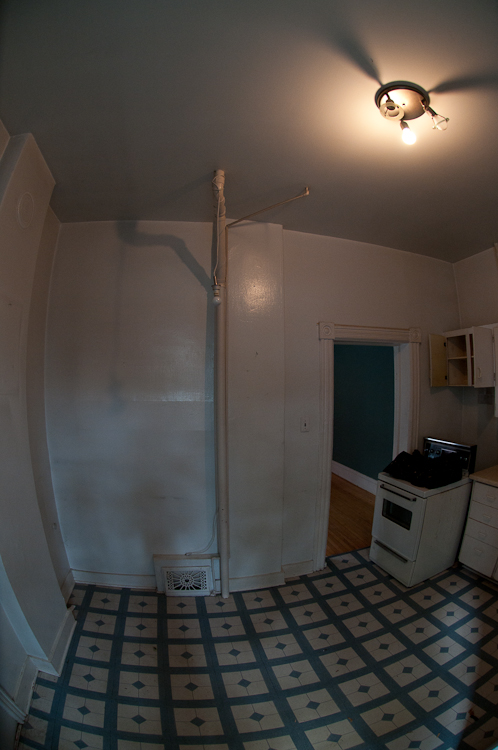
Posted by Brian in demolition, interior, photos, renovations on October 2, 2010
Today before the demolitions started, I decided it would be a good idea to shoot some photos of all the rooms so we had something to look back on. Â Decided to go with the fisheye lense even though it’s quite distorted it gives you a good idea of exactly what each room looks like. Â The one nice thing are the really high ceilings, 9.5-10′ tall, the windows are also new (a couple of years old), and all the wiring has been updated.


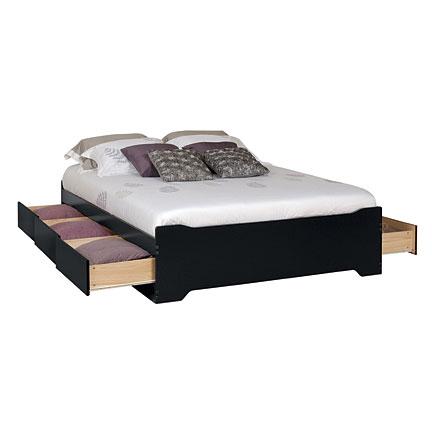
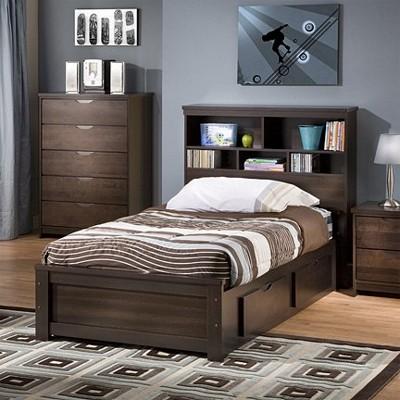
Beds with storage – small space solutions
Posted by Brian in decorating, furniture, interior, small spaces on September 9, 2010
We’ve been starting to look at some good solutions for small spaces, and one of the ideas we came up with were beds with storage underneath them. Â Actual built in storage, rather than just cramming everything and anything under the bed, the prices and style vary depending on where you look, from $300 at Ikea, to well over $1000 at Leons. Â The brick seems to have a decent selection, although I’m sure with a few visits to a couple of other stores we could definitely find something that we both really like. Â Having drawers under the bed could be great for all our extra linens, pillows, and towels. Â Here are a few of the beds we’ve found so far:


Washer Dryer combo for a small place
Posted by Brian in appliances, interior on August 3, 2010
 Ilona suggested and came up with a really clever idea for saving space in our new place, a combined washer/dryer unit, and to be honest I’d never even heard of one, let alone thought about one. Â Our initial thoughts involved a stackable washer/dryer in the corner of the kitchen in a closet. Â A traditional stacked unit would involve some new plumbing, a 220V panel, new venting to the exterior of the house, and a closet to contain the unit.
After a bit more investigation, we found out that some of the combo units like the LG WM3988HWA are the perfect size to fit inside a kitchen cabinet, require a regular 110V electrical connection, and use a drain instead of exhaust to expel the moisture.  They’re a little bit pricey ($2400 home depot), however the cost savings of having an energy efficient unit, which requires no additional contractors to install would be fantastic.  They also look pretty good, and hiding it in the kitchen under a cabinet is an added bonus.
Recent Comments