Archive for November, 2010
Building our own crown molding
Posted by Brian in diy, interior, photos, renovations on November 25, 2010
In old houses that have plaster walls and ceilings, the options are limited when it comes to finishing the corners/joints between the wall and ceiling.  We tore down the ceilings so that we could add sound and fire insulation, but left the original plaster walls in tact.  After doing some reading we realized there was no easy way to have a neat finished dry wall joint between the two.  Crown molding was the favored option from the get go, however the combination of it’s stiffness, and the crookedness of our walls/ceilings didn’t favor to well.  That’s when we came up with the idea to build our own molding out of window trim, a 1×3 mdm board and a cove (see reverse of 1/4 round).
The process was actually pretty simple, it looks great and was easy to install.  Basically we had 3 pieces that we layered on top of each other, for all the joints, we cut them at 45 degrees to force the matching up better, and used a nail gun to tack it into the wall.  Using the 3 separate flimsy pieces allowed us the luxury of bending them slightly to follow the crooked lines created by the ceiling.  Below are some photos showing the separate pieces and the partially finished product.  More photos to come when we finish up the kitchen and living room 🙂


Upper Kitchen Cabinets installed!
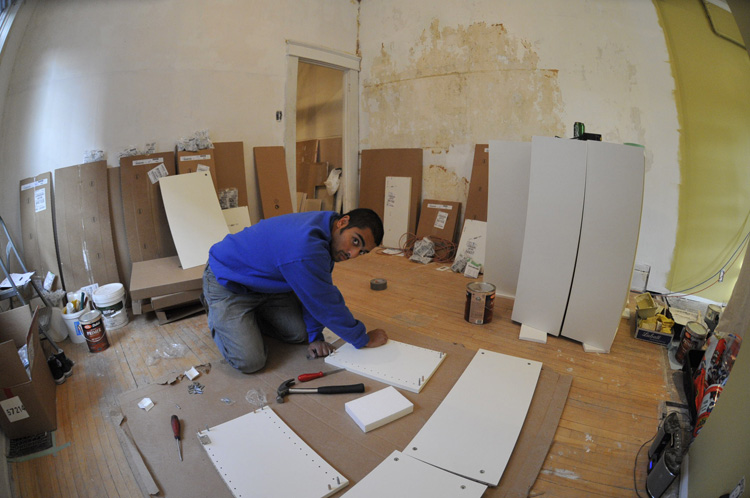
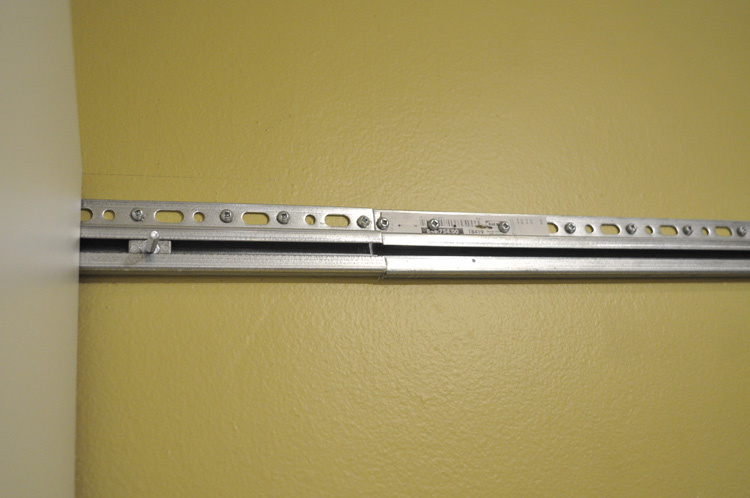
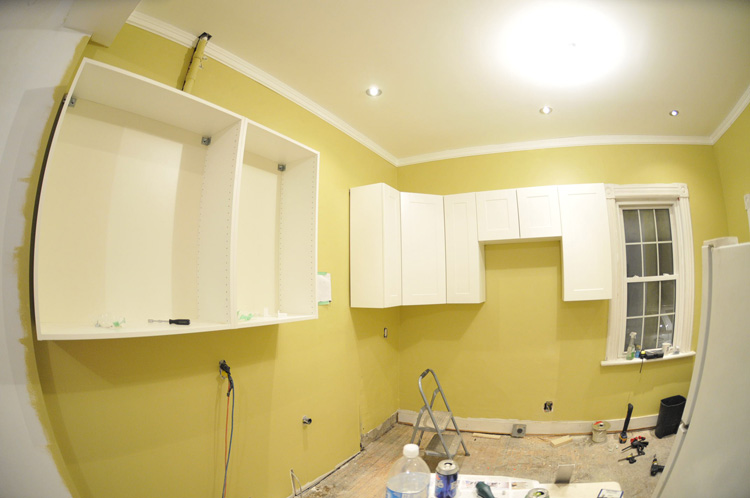
Saturday morning our friend Matt (cousin) came over and helped out with the Kitchen cabinets, when Rob told us that installing an Ikea kitchen was easy, I had no idea that it would be this easy. Â If you can build an Ikea coffee table, you can pretty much build an Ikea kitchen. Â Essentially you build all the cabinets, draw a level line on the wall at a certain height, install a horizontal metal bar/rack on that line, then hang the cabinets one at a time. Â The door hardware just snaps into the doors, and attaches right to the cabinets, fully adjustable and they all come with the anti-slam hardware. Â With 2 people it would easily be feasible in a weekend, unfortunately I had to work Sunday morning for a deploy, so I only got a few hours in, but we’ve got all the upper cabinets installed and level.
The largest upper cabinet on the left closest to the living room has glass doors that we probably won’t install until we move in, we also still have to pick out some handles for the doors, we’ll probably pick these up from Lee Valley Tools, they have the biggest (and cheapest) selection we’ve been able to find.


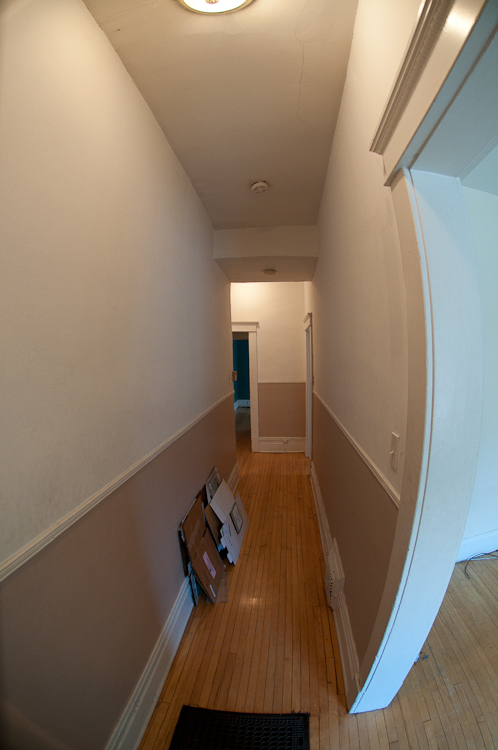
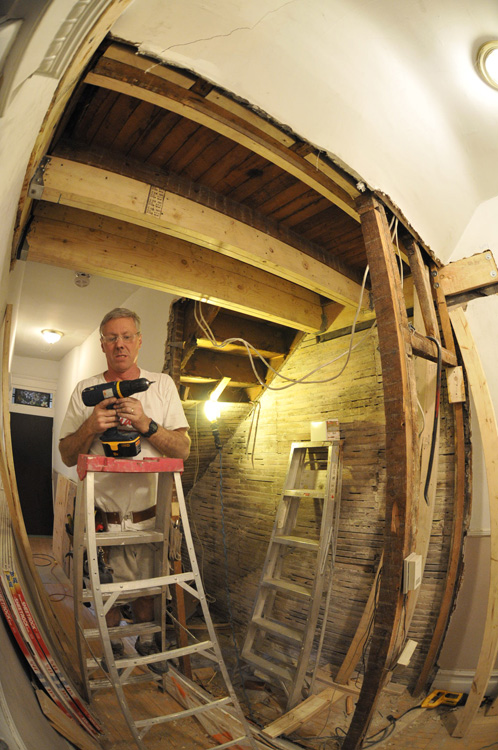
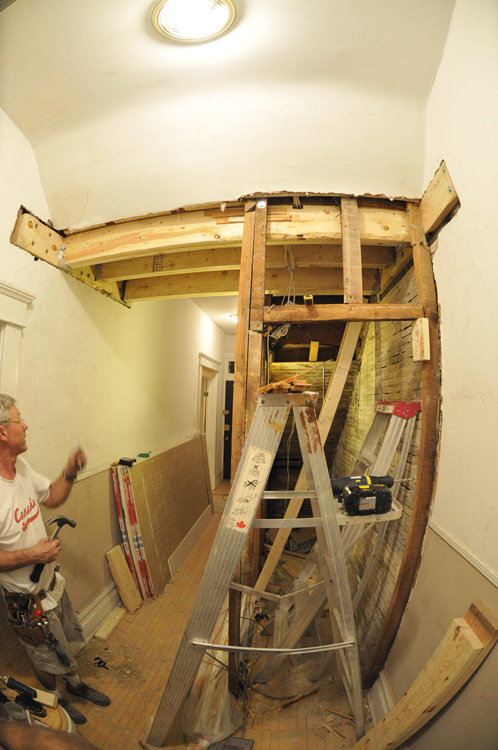
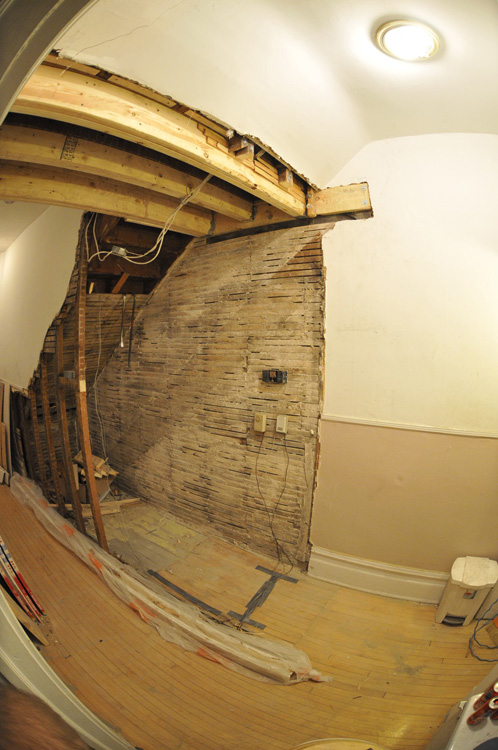
Closet under the stairs removed!
Posted by Brian in floor plans, interior, photos, renovations, small spaces on November 14, 2010
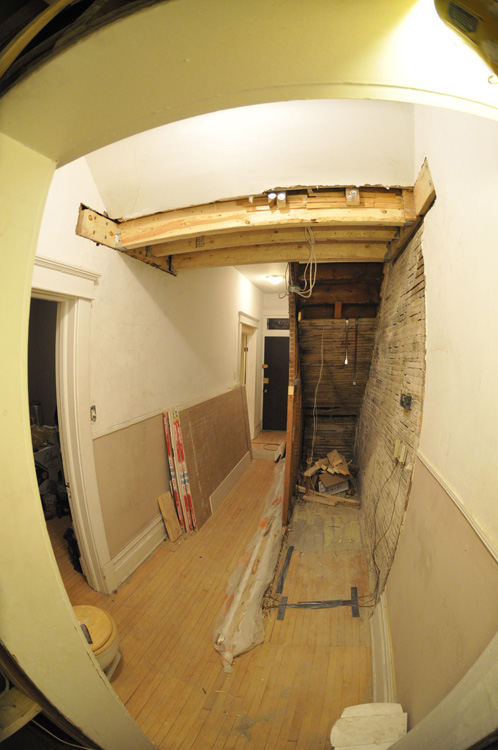
The section under the stairs has finally been taken care of, what was previously there was pretty much the most unsafe thing we’ve found in our house (so far). Â The wall that formed the closet space under the stairs was built from about 6 2×4’s with minimal bracing, what we didn’t know until we investigated further is that this wall supported the entire set of stairs, plus the landings for the 2nd and 3rd apartments!! Â We couldn’t believe it, essentially the upstairs platform was precariously balanced on the wall, and tacked into the inside hallway wall, and exterior wall.
To beef it up, we put in some new stringers in both walls, attached with about 10-12 5″ long 1/4″ thick lag screws, we then used 2 double 2×8 beams and a double 2×6 beam as the new floor joists for the landing up top, and hung those from joint hangers on the stringers. Â The result is way more space below for my computer area, and a more open hallway.
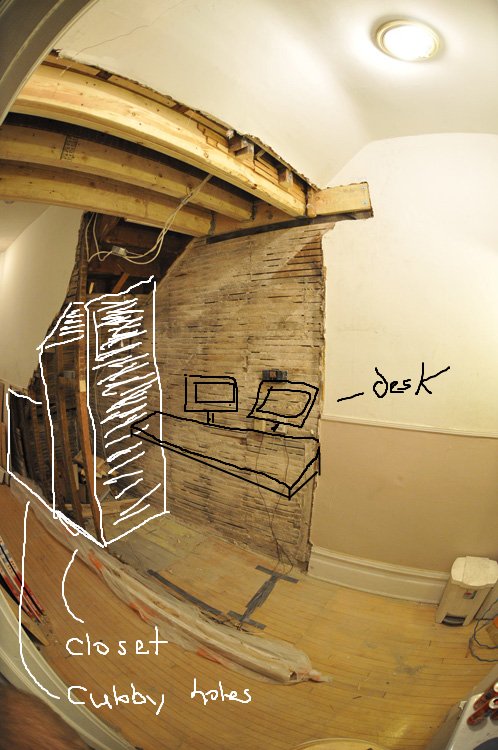
Below are some before photos, during photos, after photos, and a little sketch on one of the photos showing our plans for the space in here. Â We’re planning to build a small computer nook for myself, a closet space (without a door), some shelves, and a little cubby with a trap door/cat door to put the smelly litter boxes in. Â I’m still contemplating whether I should eventually attempt to build a small motion sensor activated fan and exhaust from that little cubby to the outside of the house.. maybe next year if we’re looking for something to work on!


Kitchen colours, custom molding and pot lights!
Posted by Brian in decorating, interior, kitchen, photos on November 7, 2010
It’s been a busy week since the last post, we’ve had lots of help from friends and family, and are finally starting to do some finishing touches. Â Last blog post we had just had the drywallers in, or coming in, to tape, mud and sand the drywall we had put up. Â Since then, last week (for back to back nights) Alex and Danny came and helped us paint, as well as Rob who helped us with painting and installing our own molding along the ceiling.
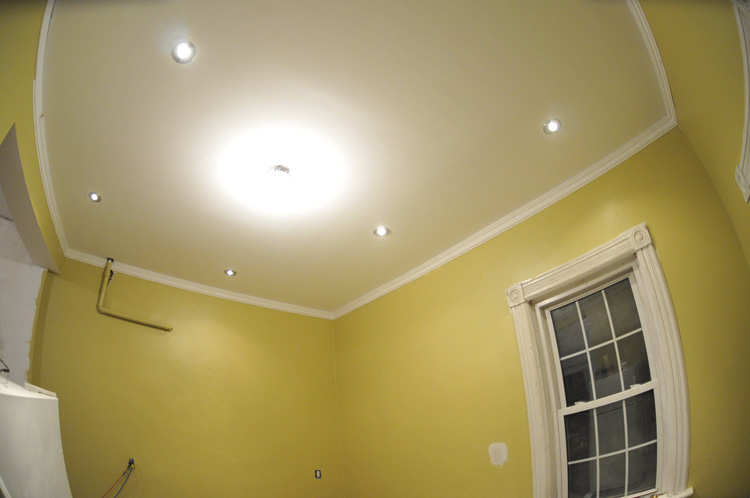
Since our ceilings and walls are so crooked and the plaster is so old, we’re unable to finish the corners where the walls meet the ceiling. Â Crown molding apparently requires relatively straight ceilings, so we decided to create our own “crown molding” out of 3 different pieces of wood/molding tacked together which allowed us to use slightly more flexible wood, and save some money at the same time.
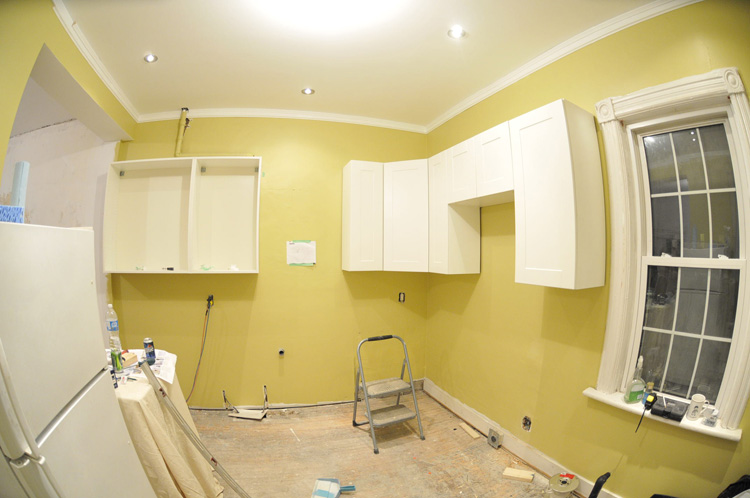
Sunday afternoon we continued putting up some of the molding, and also installed the potlights in the kitchen, Ilona was definitely much quicker at installing the lights than I was, and it was really nice to finally see some finishing touches being added. Â We still have a long ways to go, but the next update might also be just as colourful.


Kitchen & Living room drywalled!
Posted by Brian in interior, kitchen, photos, renovations on November 1, 2010
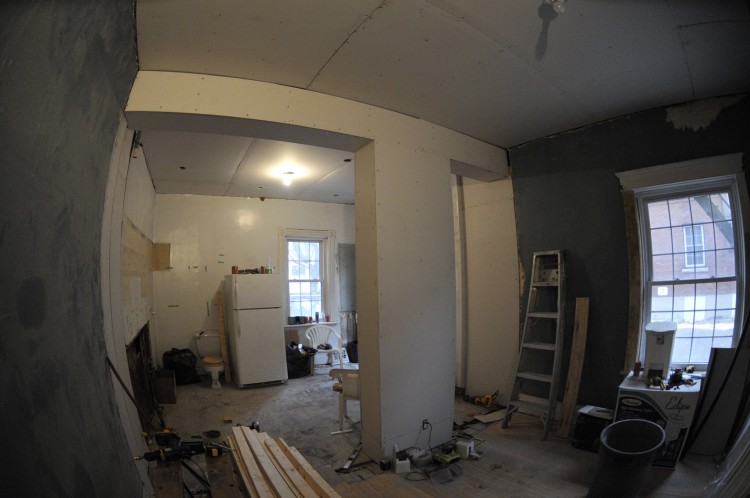
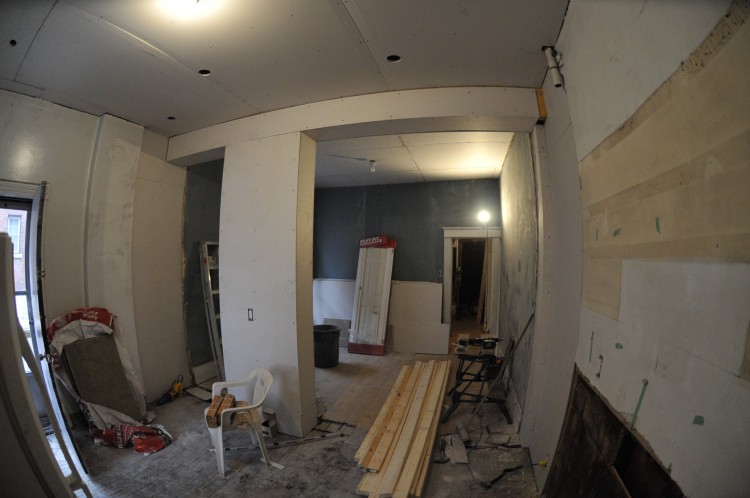
It’s been a while since an update, we’ve moved out of our condo off Walkley, into a temporary luxury suite at the Garsons residence, and have been busy working away on the new place.  Last Thursday my dad and Jean rented a drywall jack, and did the ceilings in the kitchen and living room, the following day Ilona and I successfully finished the beam and column between the kitchen and living room.  Saturday Tyler came over and we framed the 2 support columns for the beam and drywalled them as well.  Today we got the good news that our drywall finisher Derek will be done by Thursday and we should be able to paint the kitchen and living room, and start installing the cabinets!
Ilona also picked out a checkered black and white marmoleum click-tile for the kitchen floors that we might be installing soon, after some research we decided to go with marmoleum because of it’s durability and eco-friendliness, she found it at Dynasty Flooring in Ottawa. Â Here are some photos from the living room and kitchen with finished walls and ceilings:


Recent Comments